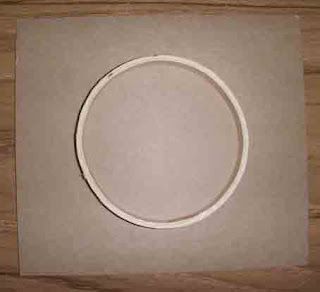
First - here is the supply list
3 inch wooden ring (inner part of embroidery hoop)
Heavy cardboard
Small piece of batting
Thread to match fabric
Fabric Glue
Paper Scissors
Fabric Scissors
Fabric
Small round container (I used Crystal Light - my favorite rasberry tea)
 Here are my supplies. The hoop I used is actually the outer part of my embroidery hoop that I used for the first jar I made. Bill took off the metal connection part and taped it closed. It worked fine.
 Next you need to measure around the outside of the hoop. In my case it was 10 1/4 inches. After adding 1/2 inch for seam allowance, I cut the fabric 10 3/4 by 12 inches. The 12 inches is the length so if your fabric is directional, make sure you cut it correctly.
 Sew the length-wise seam. I did this by hand but you could use a sewing machine for this part. After sewing, press the seam open.
With the fabric still inside out, slip the fabric through the ring and the fold it back on itself.

Pull the fabric tight around the ring and sew it tightly with a running stitch right under the ring, making sure the raw edges at the other end are even.
After sewing around the ring, put both layers of fabric through the hoop forming a lip around the hoop.
 Cut two cardboard circle the size of the inside of the ring. I used a second ring to do this but it would probably make more sense to do this before you actually cover the ring.
 After tracing the inside of the ring, cut out the two circles slightly smaller than the traced circle. Remember that the ring has fabric on it and the circles will too so they need to be slightly smaller than the opening. Be sure they are small enough to slip through the circle opening, because you will need to do that later.
 Cover each of the circles with fabric. One of them will have a piece of batting cut to the same size as the cardboard and glued to it before covering it. The photo above shows one covered and the one with batting on it ready to be covered. Be sure to cut the fabric circle large enough to be able to gather it around the cardboard. I drew a pattern for this about 1/2 to 3/4 inch larger all around the inner circle. Since I plan to make several of these, it made sense to have a pattern to use over and over. If you are only making one, just hold your cardboard on the fabric and free cut around it.
 Here are my covered circles.
 Run a gathering stitch around the bottom of the bag, though both layers. Next, I put the padded circle on an old crystal light container (any small round container will work). The fabric goes down with the cardboard up. I put some glue on the cardboard and slipped the fabric tube over it, holding it in place for a few seconds.
 Then glue the other covered circle on the outside of the jar.
 I then used a ladder stitch to fasten the outside circle to the bag. After doing this, the cardboard bottom gets pushed through the opening and the inner circle is stitched to the bag. I just used a whip stitch to do this because it is the inside of the bag.
 To close the bag/ORT jar, twist the hoop and tuck the bottom into it. Here is the finished ORT jar - closed.
 Here it is opened. Isn't it cute?
 And here it is with the first one I made. This one is slightly larger around and slightly shorter than the first one. That is because the green one was the center ring and the red was the outer ring. Both are equally cute and usable so there is no reason to just use the inside hoop.
 Cut two cardboard circle the size of the inside of the ring. I used a second ring to do this but it would probably make more sense to do this before you actually cover the ring.
 After tracing the inside of the ring, cut out the two circles slightly smaller than the traced circle. Remember that the ring has fabric on it and the circles will too so they need to be slightly smaller than the opening. Be sure they are small enough to slip through the circle opening, because you will need to do that later.
 Cover each of the circles with fabric. One of them will have a piece of batting cut to the same size as the cardboard and glued to it before covering it. The photo above shows one covered and the one with batting on it ready to be covered. Be sure to cut the fabric circle large enough to be able to gather it around the cardboard. I drew a pattern for this about 1/2 to 3/4 inch larger all around the inner circle. Since I plan to make several of these, it made sense to have a pattern to use over and over. If you are only making one, just hold your cardboard on the fabric and free cut around it.
 Here are my covered circles.
 Run a gathering stitch around the bottom of the bag, though both layers. Next, I put the padded circle on an old crystal light container (any small round container will work). The fabric goes down with the cardboard up. I put some glue on the cardboard and slipped the fabric tube over it, holding it in place for a few seconds.
 Then glue the other covered circle on the outside of the jar.
 I then used a ladder stitch to fasten the outside circle to the bag. After doing this, the cardboard bottom gets pushed through the opening and the inner circle is stitched to the bag. I just used a whip stitch to do this because it is the inside of the bag.
 To close the bag/ORT jar, twist the hoop and tuck the bottom into it. Here is the finished ORT jar - closed.
 Here it is opened. Isn't it cute?
 And here it is with the first one I made. This one is slightly larger around and slightly shorter than the first one. That is because the green one was the center ring and the red was the outer ring. Both are equally cute and usable so there is no reason to just use the inside hoop.
I think this would work with any firm circle - I might try it with the cardboard circle from the inside of a roll of masking tape. I think it would work. There are probably several other things that would also work - bracelets come to mind.
I hope you can follow my directions. If there is any questions, just let me know but be sure there is a way I can contact you.
I hope you can follow my directions. If there is any questions, just let me know but be sure there is a way I can contact you.


Thank you Melinda for the Ort Jar pattern. These are going to be fun to make for my 9 retreat gals. We have a schedule 3 day retreat on March 6, 7, and 8. I am going to surprise them with this little gift.
ReplyDeleteGale/Oklahoma
Melinda this is a great tutorial! Thanks, Sharon
ReplyDeleteMelinda. Love your tutorial. It's a very neat idea and will give it a try ASAP. Could you please tell me what does 'ORT' mean? Thanks in advance.
ReplyDeleteI am so happy to have found this. The instructions that came with my chart were so hard to understand. You saved me!! Thank you!!
ReplyDeleteI have same question as Donna what is ORT? whatever it is, it's cute and a good tutorial, however, you may want to explain what they are though....something regional? I look at lots of blogs, mags, books, tv shows and this is an unknown, new must know thing!!! lol!!!
ReplyDeleteThat is great - thanks so much for sharing this with us. Love the trick with the tea jar!
ReplyDeletePlease tell me also, what is an ort?
ReplyDeleteThis comment has been removed by the author.
ReplyDeleteMeaning of "ort": http://www.merriam-webster.com/dictionary/ort (seems you'll need to copy and paste it to make it work.
ReplyDeleteAlso, it seems to me that a ring from a mason jar might be fabulous at the top.... just thinking out loud...